

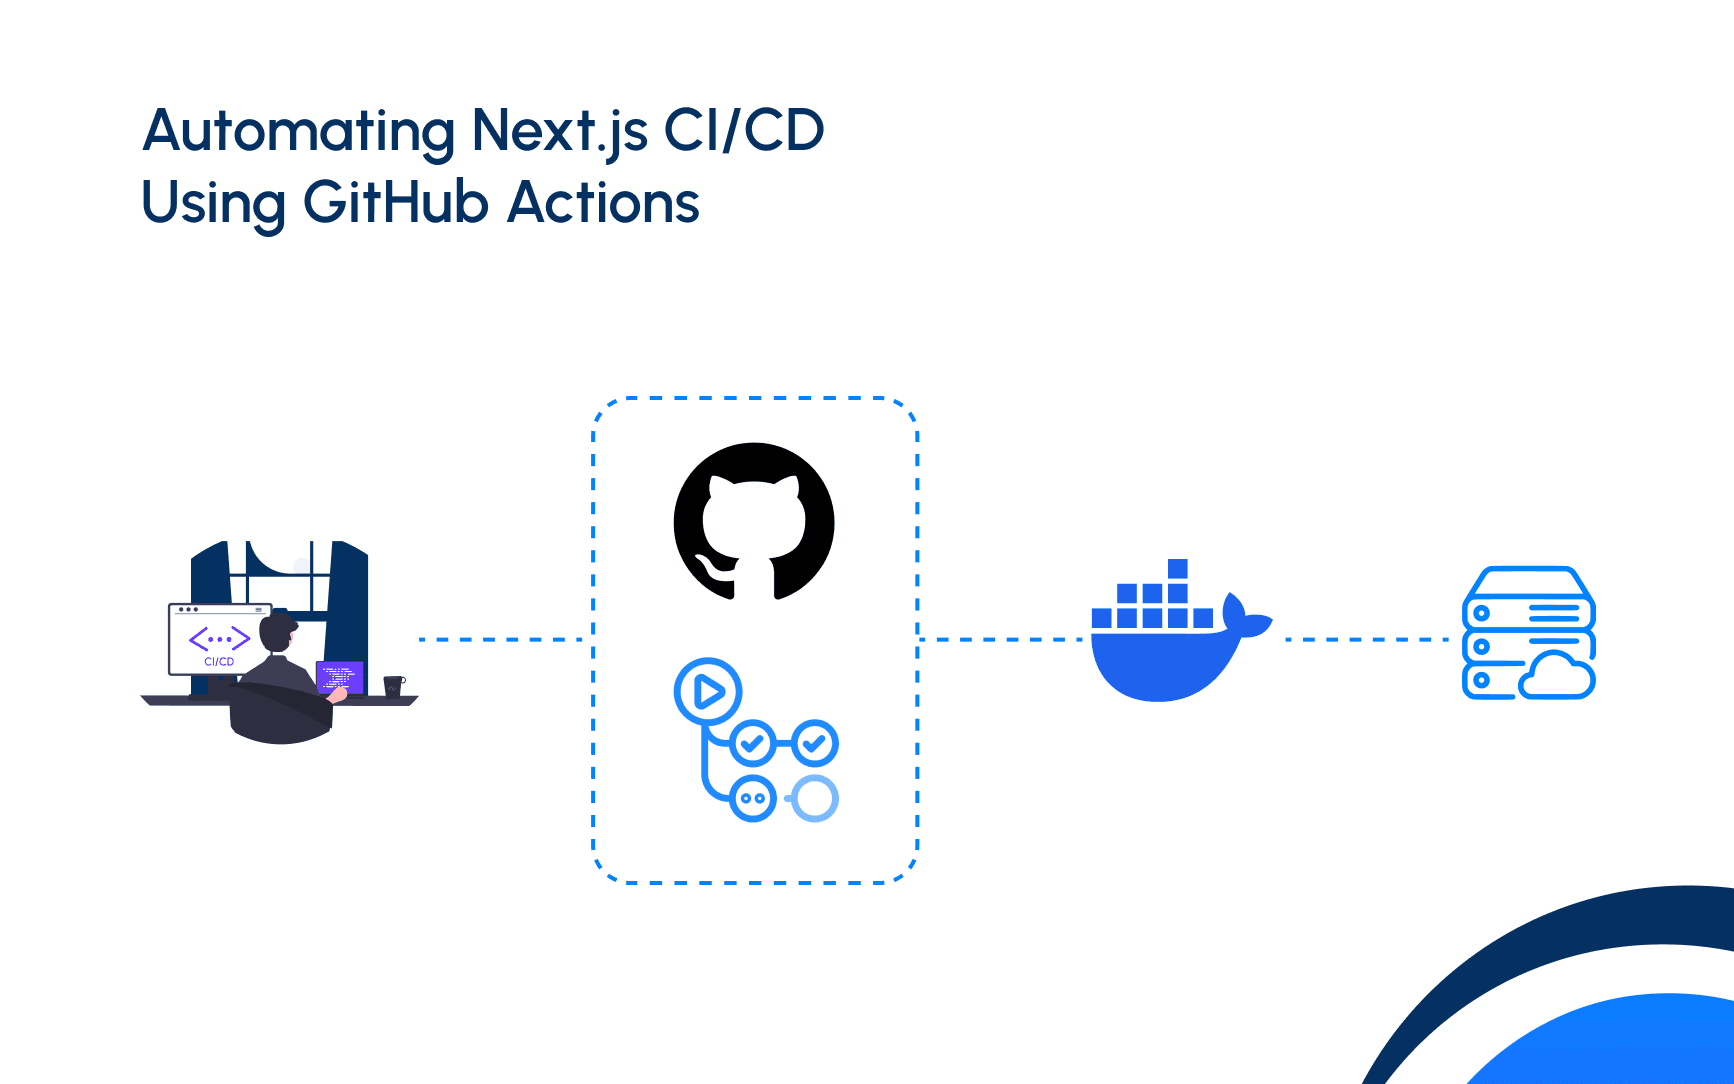
In our previous tutorials, we explored Dockerizing a Next.js application and deploying it to a remote VPS using docker-compose. While effective, this method required manual steps like building and pushing Docker images and managing deployments on the server. To streamline this process, we'll dive into the concept of Continuous Integration and Continuous Deployment (CI/CD) and automate it using GitHub Actions.
Understanding CI/CD
CI/CD stands for Continuous Integration and Continuous Deployment. It's a practice where developers frequently integrate code changes into a shared repository (Continuous Integration) and automatically deploy those changes to production environments (Continuous Deployment) through automated pipelines.
Setting Up CI/CD with GitHub Actions
Step 1: Prepare Remote Server
Log in to the remote server and create a directory in the home folder, e.g., next-js-cicd
mkdir next-js-cicdNavigate into the directory and create a docker-compose.yml file with the necessary configurations. The detail of this configuration is mentioned in this tutorial.
version: '3.8'

services:
  app:
    image: dallotech/nextjs-blog:latest
    platform: linux/amd64
    build:
      context: .
      dockerfile: Dockerfile
    ports:
      - "3000:3000"
    restart: always
Step 2: Create GitHub Repository
Create a repository for your Next.js application on GitHub.
Step 3: Configure Repository Secrets
Navigate to Settings -> Secrets and Variables -> Actions in your GitHub repository. Create the following secrets:
DOCKER_HUB_TOKEN: Token for pushing Docker images to Docker Hub. Method of generation of this token is mentioned in this tutorialDOCKER_HUB_USERNAME: Docker Hub username.REMOTE_SSH_HOST: Host IP address of the remote server.REMOTE_SSH_PW: Password for SSH login.REMOTE_SSH_USER: Username for SSH login.REMOTE_WORKING_DIR: Path of the directory on the remote server.
*Note: This tutorial is based on SSH password-based VPS login, for PEM files or SSH-based login like AWS ec2 will be covered in future blogs.
After completion, it will look like this

Step 4: Define GitHub Action Workflow
In your project's root directory, create a deploy-docker.yml file inside .github/workflows/ the directory. The folder structure will look like

Add the workflow configuration in the docker-deploy.yml file. This file is the command for github actions.
name: vps-deploy

on:
  push:
    branches: [ "master" ]

env:
  REGISTRY: dockerhub.io
  IMAGE_NAME: dallotech/nextjs-blog:latest

jobs:
    publish:
        name: publish docker image
        runs-on: ubuntu-latest

        steps:
        - uses: actions/checkout@v3
        - name: Login to docker
          run: |
            echo ${{ secrets.DOCKER_HUB_TOKEN }} | docker login -u ${{secrets.DOCKER_HUB_USERNAME}} --password-stdin
        - name: Build and Publish in docker hub
          run: |
            docker-compose build
            docker-compose push


    deploy:
        needs: publish
        name: deploy image in remote vps
        runs-on: ubuntu-latest

        steps:
        - name: Login to vps and deploy
          uses: appleboy/ssh-action@v0.1.3
          with:
            host: ${{secrets.REMOTE_SSH_HOST}}
            username: ${{secrets.REMOTE_SSH_USER}}
            password: ${{ secrets.REMOTE_SSH_PW }}
            port: 22
            script: |
              cd ${{ secrets.REMOTE_WORK_DIR }}
              docker-compose pull
              docker-compose up -d
Let's go through each line of the docker-deploy.yml file
name: Publish and Deploy- This line sets the name of the workflow. It will appear in the GitHub Actions dashboard.
on:
  push:
    branches: [ "master" ]
- This section defines the event trigger for the workflow. In this case, the workflow will be triggered whenever there is a push event to the
masterbranch.
env:
  REGISTRY: dockerhub.io
  IMAGE_NAME: dallotech/nextjs-blog:latest
- Here, environment variables are defined. These variables will be used later in the workflow steps to reference the Docker registry and image name.
jobs:
  publish:
    name: Publish Image
    runs-on: ubuntu-latest
- This section defines a job named "Publish Image" that will run on an Ubuntu latest virtual machine. Jobs are the individual tasks that make up a workflow.
    steps:
      - uses: actions/checkout@v3
- This step uses a pre-built GitHub Action (
actions/checkout) to check out the repository code on the runner machine.
      - name: Login to Docker Hub
        run: echo ${{ secrets.DOCKER_HUB_TOKEN }} | docker login -u ${{ secrets.DOCKER_HUB_USERNAME }} --password-stdin
- This step logs in to Docker Hub using the provided credentials stored in GitHub secrets. The
DOCKER_HUB_TOKENis piped intodocker logincommand to authenticate.
      - name: Build and Push Docker Image
        run: |
          docker-compose build
          docker-compose push
- This step builds the Docker image for the Next.js application using
docker-compose buildand pushes it to the Docker registry usingdocker-compose push.
  deploy:
    name: Deploy Image
    needs: publish
    runs-on: ubuntu-latest
- Similar to the previous job, this section defines another job named "Deploy Image" that will run on an Ubuntu latest virtual machine. It specifies a dependency on the "publish" job, meaning it will only run after the "publish" job is completed.
    steps:
      - name: Connect and Pull
        uses: appleboy/ssh-action@v0.1.3
        with:
          host: ${{ secrets.REMOTE_SSH_HOST }}
          username: ${{ secrets.REMOTE_SSH_USER }}
          password: ${{ secrets.REMOTE_SSH_PW }}
          port: 22
          script: |
            cd ${{ secrets.REMOTE_WORKING_DIR }}
            docker-compose pull
            docker-compose up -d
- This step uses the
appleboy/ssh-actionGitHub Action to connect to the remote server via SSH and execute commands. It pulls the latest Docker image from the registry onto the server and then restarts the application usingdocker-compose up -d.
Step 5: Commit and Push Changes
Commit the changes to your project and push them to the master branch of your GitHub repository.
Step 6: Monitor Deployment
Navigate to your GitHub repository, then to the Actions tab to monitor the progress of the deployment.

Once the workflow execution is complete, your Next.js application will be deployed and accessible on port 3000 of the remote server.
By automating the CI/CD pipeline with GitHub Actions, you can streamline the deployment process, ensuring faster and more reliable deployments for your Next.js application. To learn more or get assistance, reach out to me at anuj@dallotech.com.
.png&w=3840&q=75)
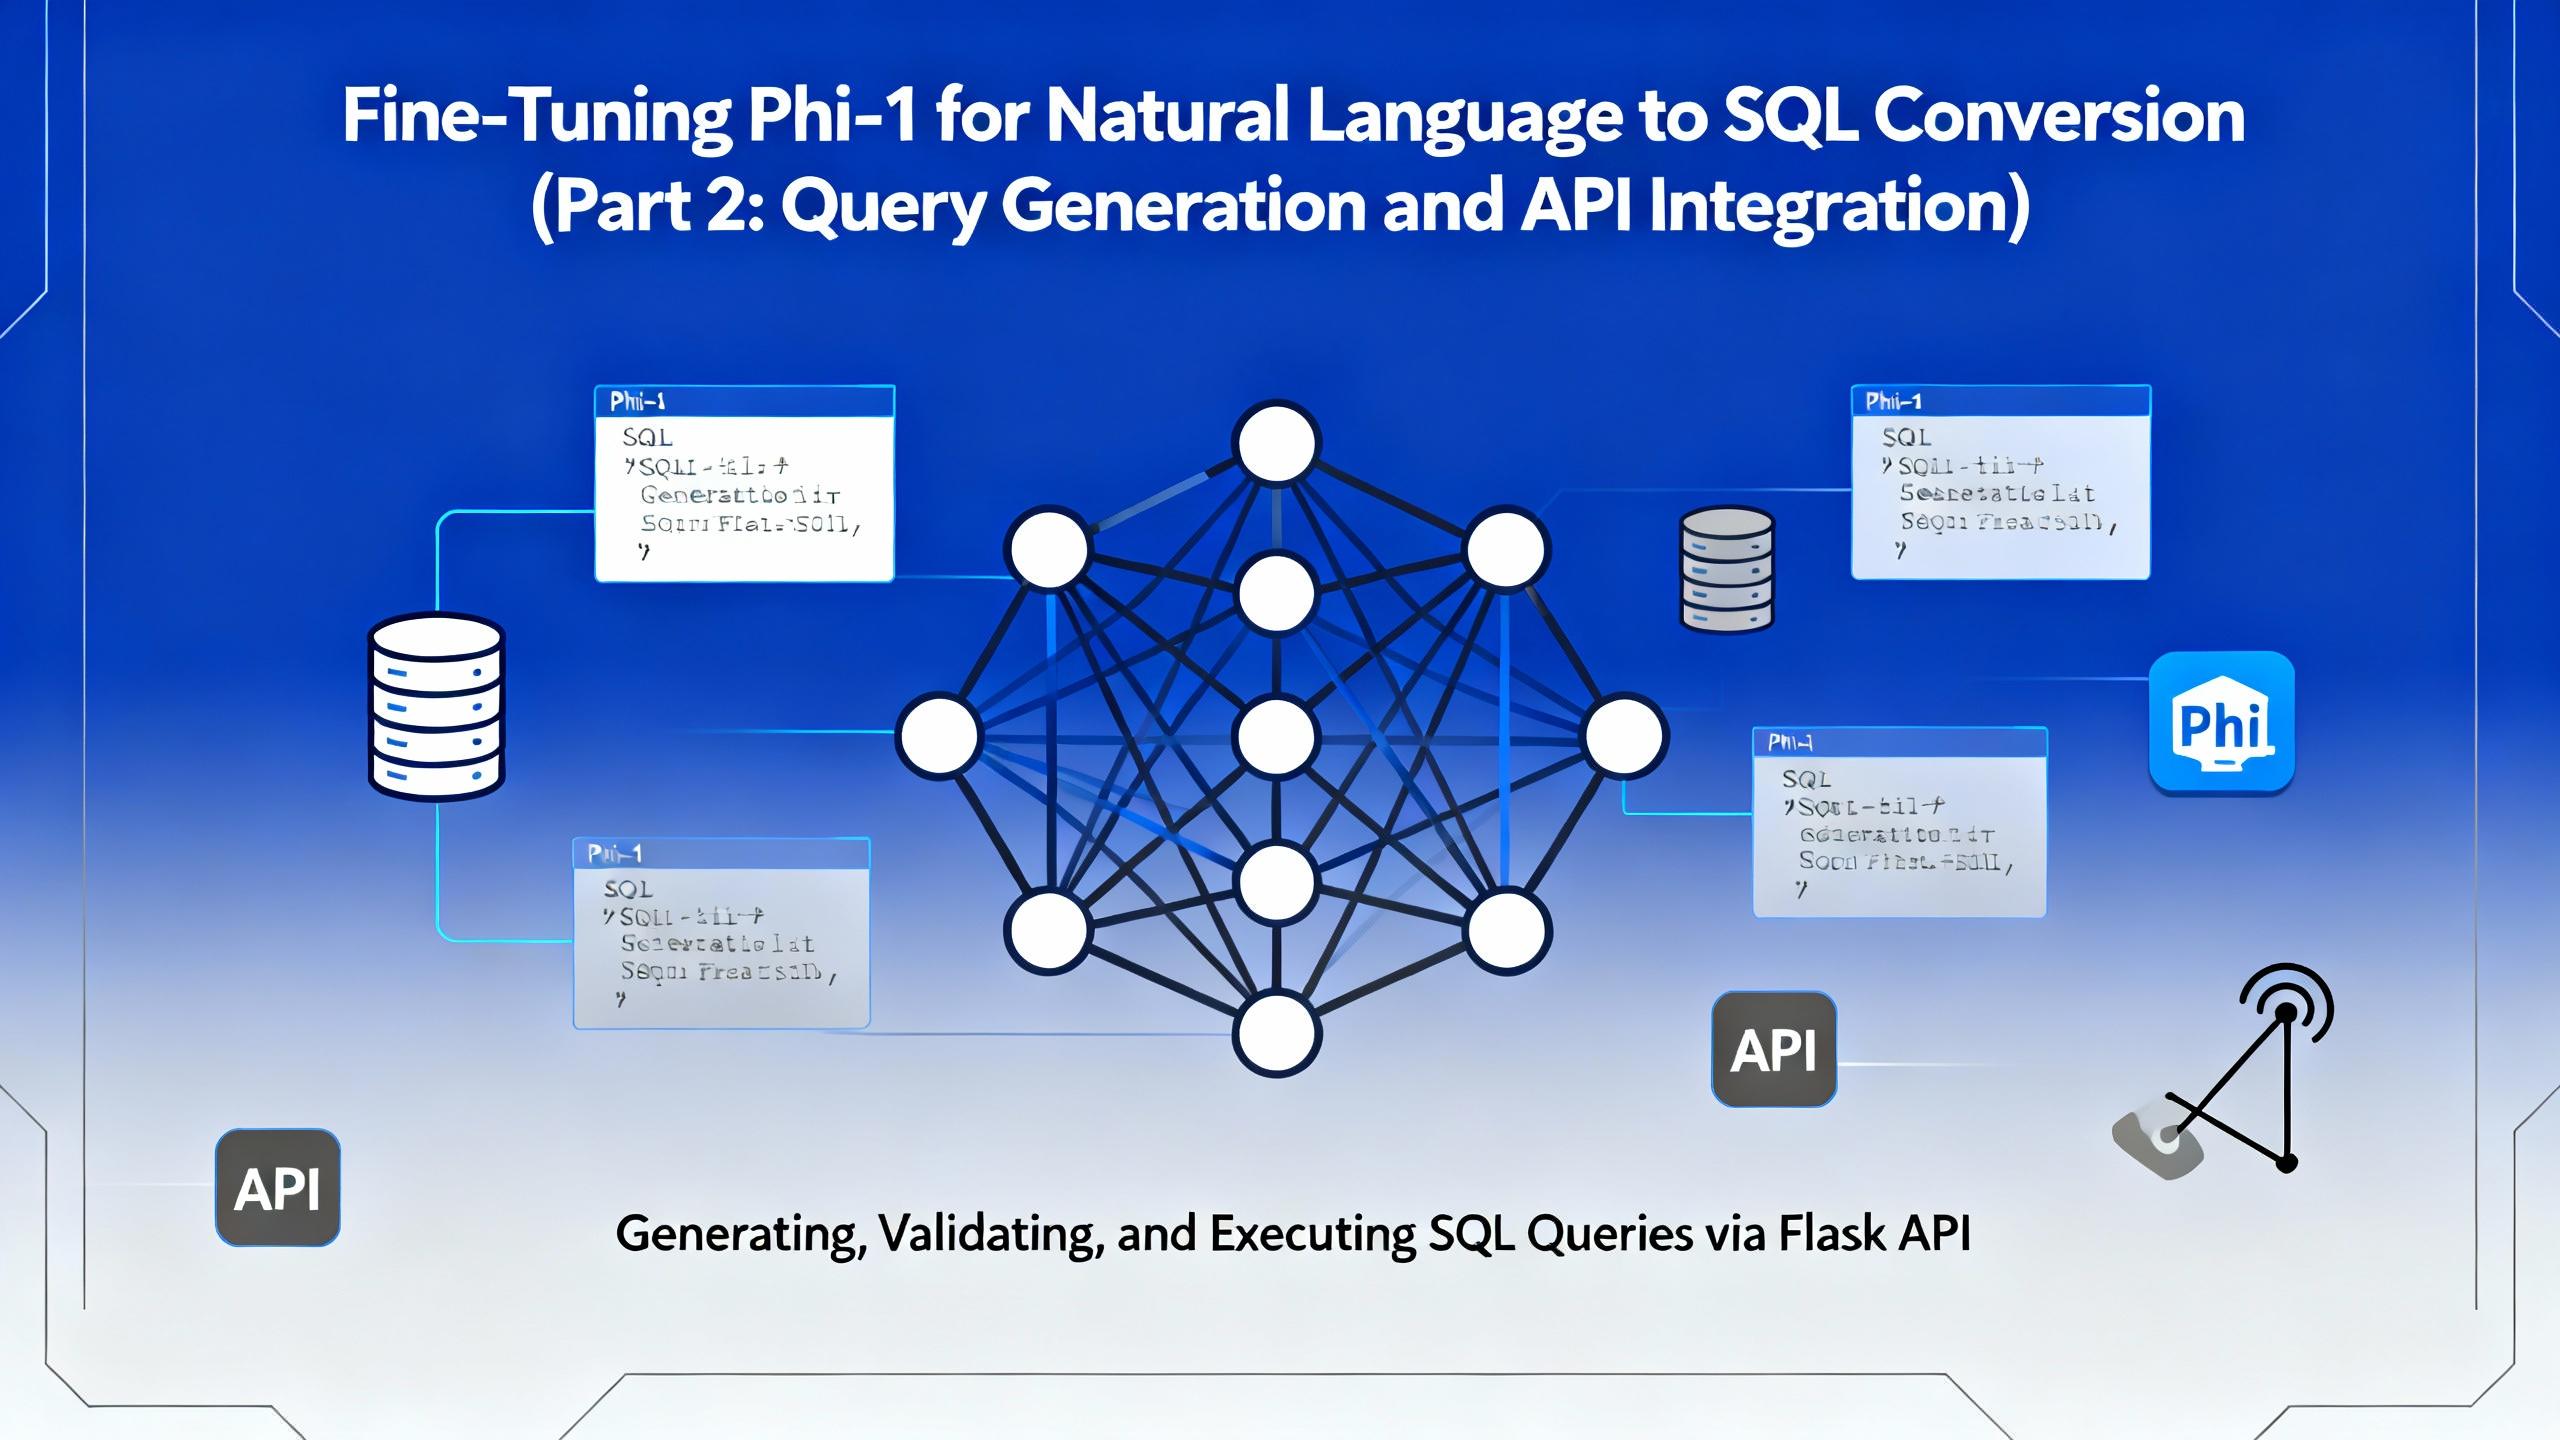
In the second part of this series, we move beyond model training and bring our fine-tuned Microsoft Phi-1 to life. This article focuses on query generation, safe SQL execution, and building a Flask-based API that allows real-time interaction with financial databases.

In today’s data-driven world, being able to query databases with natural language is becoming increasingly valuable. Imagine simply typing: “Show me the total interest income of Kumari Bank in April 2022” and instantly receiving a valid SQL query (and even the corresponding chart!) — no manual SQL writing required.

Discover the power of vibe coding building a Discord attendance bot with AI, transforming a clunky biometric system into a modern solution. Learn how AI-driven development can revolutionize your business, contact DalloTech for custom solutions!
Explore the essentials of IP binding in Dockerized applications with this insightful Dallo Tech blog post. Gain expert tips and best practices to optimize your containerized workflows effectively.
